How I built my Personal Blog with Next.js 13, Vercel and Contentlayer - Part 1
Over the past week or so in my spare time I've been busy building my new Personal Blog Site (which you are currently looking at 😉) using Next.js 13's new App Directory, Contentlayer's easy to setup tooling for working with Markdown/MDX and deployed it with just a few clicks to Vercel's amazing platform completely for free!
Now it's mostly finished, only been working on tweaks and enhancements, and I've tested it fully by posting my first post. I've decided to write about how I got this setup in around 5 hours worth of work over a weekend and how you could do the same. I'll cover some questions such as; Why the hell I would build my blog from scratch instead of using one of the countless offerings out there, and Why I chose the technologies I did.
If you aren't interested in the background or the reasons that I chose to use; NextJS, Contentlayer and Vercel then you can skip to getting started to see how you can build a basic blog with a post feed yourself in just a few minutes.
This will be the first part in a series of posts on this topic, part 2 is also now available to read.
Why build a blog from scratch in the first place?

Why would you build a blog from scratch when there are countless existing platforms that would have required a single click to setup? And it's an extremely valid question, even after spending my time building this site, I am still planning on re-publishing my content on Medium to reach a larger audience. But there are a few reasons why I inevitably decided to build my own blog from scratch:
- I'm just that type of person: Being a Software Developer and a naturally inquisitive person, I like to know how the tools I'm using work "under the hood". I've never been satisfied with just using something because it works, I always like to know how it works and more importantly why it works the way that it does.
- The challenge and opportunity to learn: Building a blog that statically generates content can require a lot of effort to get setup and even more so if you want it to work properly and look nice while it's doing it. But to me that's part of the fun, the opportunity to expose myself to and learn new tools/frameworks that I might have otherwise overlooked because it wasn't for a "hobby project".
- Full control and autonomy: One of, if not the most significant advantages of building your own personal website/blog from scratch is that you have 100% full control and autonomy over it. How it looks, how it works, how it's deployed and the content that's on it is completely up to you as you are the complete owner of all the code and content. You can add/remove features and do literally anything you set your mind to, if this is something you want I would highly recommend building from scratch, especially if you are quite picky.
- Not locked into a specific platform: By building and hosting everything yourself it means you aren't tied into a specific platform. You are free to move your site anytime you want, host it anywhere you want and quite honestly do anything you want to do with it!
- Customisation: As you aren't using a specific platform/template you can do literally anything with it and make the site completely your own. There are literally zero restrictions on what you can do, as long as it's possible with current web technology of course. If you do this right you can make your site truly unique!
There are of course some downsides to building your blog from scratch:
- Time investment: One of the main downsides is the time investment, your time is valuable and if you have to spend time that you
would otherwise have spent writing content for your blog on writing features that come standard with "out of the box" platforms then
that could be seen as a waste of time. Building features from scratch to a good quality takes a lot of time and effort so you need to be
happy with the trade off that this represents.
Customization + Quality => TimeInvestment - Hosting charges: At least with the initial deployment of this blog the hosting charges are £0/month. But with growth, which anyone starting their blogging endeavour of course hopes for, then this could raise as you reach your allocated resource limits. These types of scaling pain points affect any type of site/app on the web, so you will need to have a clear plan to deal with these.
- Discoverability: Writing articles that nobody can find is enough to put anybody off when it comes to the time investment of writing content for any site. You'll have to build an audience from scratch which can be incredibly daunting and demoralising, but there are ways to combat this such as re-posting on existing sites such as Medium to benefit from it's existing search reputation.
- Routes to monetization: While there are ways to monetize content on your own site such as Google AdSense or Patreon, it can be more difficult than on other platforms that provide partnership schemes.
Of course there are positives and negatives to everything you do. I have detailed these here just so you know what you are getting into if you decide to follow this path.
Why did I choose the technologies I have?
Onto our second topic for this post, why choose the specific technologies I have to build this blog?
There are a number of building blocks you could use to implement any application, some are right for the job and some of them are not.

So I would like to quickly go through the main building blocks of the blog; NextJS, ContentLayer and Vercel.
Why NextJS?
Next.js and more specifically v13 has been almost somewhat of a spiritual awakening for me into the world of React, SSG, Server Side Rendering and Edge. I had dabbled with Next.js before but never quite connected with it on the level that I needed to for me to be comfortable using it in anything serious, or even using it in hobby projects. Next.js 13 changed that for me with the introduction of the App Directory, this new structure along with the introduction of React Server Components gave me the push I needed to properly investigate Next.js and dive into creating some Hobby Projects with it. And after experimenting with it's new mental model for creating apps I just instantly fell in love ❤️. (As a side note, I know it's technically Next.js but I just prefer writing it as NextJS 🤷)

One of the strong points of NextJS is that it can statically generate pages at build time, which is great for our use case as it's going to almost entirely consist of static content. Any content that I can't statically generate, such as OpenGraph images, I'm planning on deploying as either serverless or edge compute by virtue of Next's integration with it's creator Vercel's platform.
Why Contentlayer?
Contentlayer is a Content SDK for validating, transforming and using your content in React in a type-safe format that you can easily import into your application. For more information about contentlayer I would suggest reading their blog post. Put simply this package has made it trivial to build your content including Markdown/MDX into an easily consumable and strongly typed format for use in NextJS. I've had some limited experience with content generation before with some static site generators (mainly for documentation sites), but I have to say without a doubt using contentlayer has been game changing. And it demonstrates the accessibility and customization provided by some of these modern tools in the web-dev ecosystem.
Why Vercel?
Ever since learning about Vercel I have been looking for an excuse to use it for a project, and after deploying my personal blog with it I can wholeheartedly say It's my new favourite way to deploy projects period. From pushing my git repo to having the site up and running took literally minutes, it took me longer to remember my GoDaddy password so that I could setup the custom domain than it did to get this site built and running.
Platforms like Vercel are really taking us into a golden age of one click deployments and near-instantaneous builds. And to say at present this is all running on their incredible Free Tier, which includes everything you need including automatic HTTPS/TLS certificates it's an extremely impressive and compelling experience.
Vercel also excels at delivering your content as rapidly as possible. It's excellent caching and edge functions ensure your content is as close to your users location as possible giving them an extremely performant experience.

Getting started
So without further delay, lets start talking about how I built this site. A lot of credit goes to Contentlayer's excellent getting started guide, for which a lot of steps in this first post are going to be similar.
As I personally use Yarn in almost every project, all of the examples shown will be using yarn. But all
of the scripts will be possible with your package manager of choice after a few minor tweaks.
1. Create the Project
First step is to create a new NextJS project, the command below creates a new NextJS App called next13-blog in the current directory with
the following options:
- Enables TypeScript (I believe this might be the default now, but just to be safe I have included it anyway)
- Configures Tailwind CSS
- Configures ESLint
- Enables the
app/directory from NextJS 13 - Initializes NextJS with it's files in the
src/directory (This is a personal preference as I think it's cleaner but you could leave this out) - Configures an Import Alias of
~/*that points to thesrc/directory (Again, personal preference you could configure your preferred alias or not configure one at all!)
yarn create next-app@latest --ts --tailwind --eslint --experimental-app --src-dir --import-alias "~/*" next13-blog
cd next13-blog
After that command completed I did a few small tweaks to the project, these are changes that I always make to new NextJS Projects. I'm not going to create individual steps for them all as they don't directly relate to this example, but you can see the changes in this commit
To prepare for the changes we are going to make, let's remove some the default content created by create-next-app that we won't be needing:
- Delete
public/next.svgandpublic/vercel.svg - Delete
src/app/api/hello/route.ts - Delete
src/app/favicon.ico - Delete
src/app/page.tsx
We will leave src/app/layout.tsx and src/app/globals.css as we will be making use of them in our project. This should leave you with a
nice and clean starting point, and we can now continue with setting up our Blog.
2. Install Contentlayer
These next steps are to install and configure Contentlayer, first we need to install the required packages.
yarn add contentlayer next-contentlayerNext we need to wrap our NextJS configuration with Contentlayer (withContentlayer), this allows Contentlayer to hook into NextJS's build
process to generate our content when we run commands such as next dev or next build:
const { withContentlayer } = require('next-contentlayer');

/** @type {import('next').NextConfig} */
const nextConfig = {
  experimental: {
    appDir: true,
  },
  swcMinify: true,
};

module.exports = withContentlayer(nextConfig);
We then need to add a few lines into our tsconfig.json that allow the generated content files to be accessible within our code:
{
  "compilerOptions": {
    "baseUrl": ".",
    // ^^^^^^^^^^^^
    "paths": {
      "contentlayer/generated": ["./.contentlayer/generated"]
      // ^^^^^^^^^^^^^^^^^^^^^^^^^^^^^^^^^^^^^^^^^^^^^^^^^^^^
    }
  },
  "include": ["next-env.d.ts", "**/*.tsx", "**/*.ts", ".contentlayer/generated"]
  //                                                ^^^^^^^^^^^^^^^^^^^^^^^^^^^
}
Contentlayer will generate files in the .contentlayer/generated directory. The added lines tell TypeScript to create an alias
contentlayer/generated for us to access the generated files from within our code.
Finally, we should add the .contentlayer to our .gitignore to ensure that built files aren't included in git.
3. Let's define our Post Schema
Now that everything is installed we need to define our configuration for Contentlayer. In this configuration we are going to define the schema for the documents that make up out content. A document being an individual piece of content such as a set of Markdown/MDX files that will be transformed into type-safe structured data that you can use in your components.
Because for this example we are just building a simple blog, we are going to define just a single document type called Post. To do
this we create a new file called contentlayer.config.ts in the root of our project, and we will add the following to it:
import { defineDocumentType, makeSource } from 'contentlayer/source-files';

export const Post = defineDocumentType(() => ({
  name: 'Post',
  filePathPattern: '**/*.md',
  fields: {
    title: {
      type: 'string',
      description: 'Title of the post',
      required: true,
    },
    publishedDate: {
      type: 'date',
      description: 'Date that the post was published',
      required: true,
    },
  },
  computedFields: {
    url: {
      type: 'string',
      resolve: (post) => `/posts/${post._raw.flattenedPath}`,
    },
  },
}));

export default makeSource({
  contentDirPath: 'posts',
  documentTypes: [Post],
});
This configuration file specifies a single document type called Post and it expects these documents to be .md files that
exist within a directory called posts in the root of your project. In the definition above we say that all objects generated from
these files will have the following properties:
title- String pulled from the documents frontmatter.publishedDate- JavaScriptDateobject, pulled from the documents frontmatter.url- A computed String that is the name of the file (without the extension) with/posts/prepended to it. This is used to define the path that your content will be available on within your site.
Finally, there is also the body which is included by Contentlayer by default, this is an object that contains the raw content
from the Markdown files (just Markdown for now, we will look at MDX later) and the converted html string.
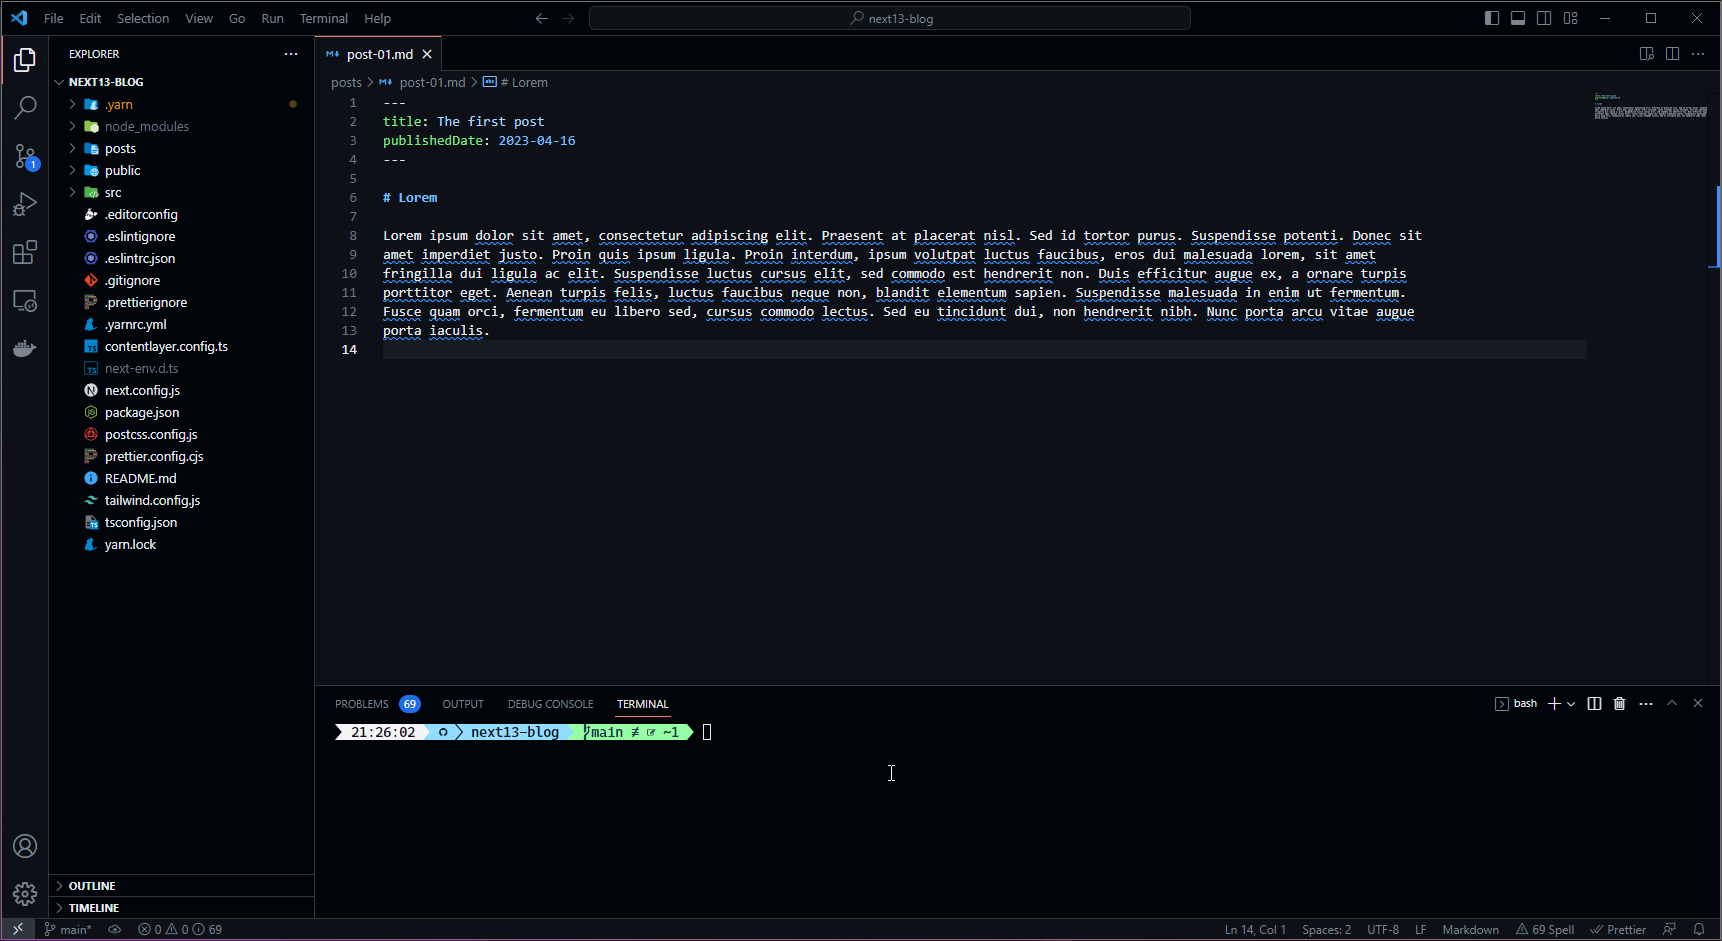
4. Add your first Post
This of course doesn't actually need to be a proper post, you just need to add one or more .md files into the posts
directory and add some content into them. Here's an example of what a post file might look like with our example setup:
---
title: The first
publishedDate: 2023-04-16
---

# Lorem

Lorem ipsum dolor sit amet consectetur, adipisicing elit. Eos ea nam tenetur nobis nisi necessitatibus ratione inventore quis
vitae odit hic quam, aspernatur facere expedita voluptas doloremque. Neque, quam commodi?
For the following examples, I have defined three posts posts/post-01.md, posts/post-02.md and posts/post-03.md
but you can of course call these anything you would like and fill them with anything you want.
5. Add a simple feed
Now we have defined our posts (or at least our example posts) we can start getting this data into our pages. Let's begin by starting
yarn dev so that our dev server is running and our .contentlayer directory and files are generated.
Due to a bug in Contentlayer at the time of writing the .contentlayer directory might not be automatically generated when
running yarn dev so you may need to manually run yarn contentlayer build for the content to be generated which you
may have seen in the above gif.
Edit: This has been fixed with v3.2.0 of Contentlayer and this additional step should no longer be required.
Now we have our content transformed into type-safe data let's create a simple page to display all of our posts as links. We do this quite
simply by creating a new page at the root of our project and importing allPosts which is an array of Post objects from
the contentlayer/generated path. Using this generated array of posts we can access the data from our posts that we defined earlier
such as the title, publishedDate and url:
import { allPosts } from 'contentlayer/generated';
import Link from 'next/link';
export default function Page() {
const posts = allPosts.sort((a, b) => new Date(b.publishedDate).getTime() - new Date(a.publishedDate).getTime());
return (
<div className="mt-4 flex flex-col space-y-4">
<h1 className="mx-4 text-3xl font-bold">Example Blog</h1>
{posts.map((post) => (
<div key={post.url} className="mx-4 bg-zinc-200 p-4">
<Link href={post.url}>
<h2 className="text-lg font-bold">{post.title}</h2>
<time dateTime={post.publishedDate} className="block text-sm text-zinc-600">
{post.publishedDate}
</time>
</Link>
</div>
))}
</div>
);
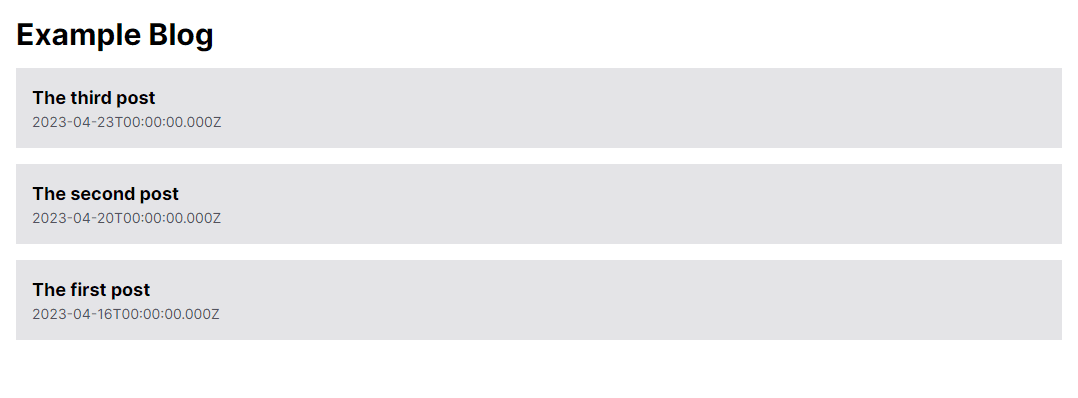
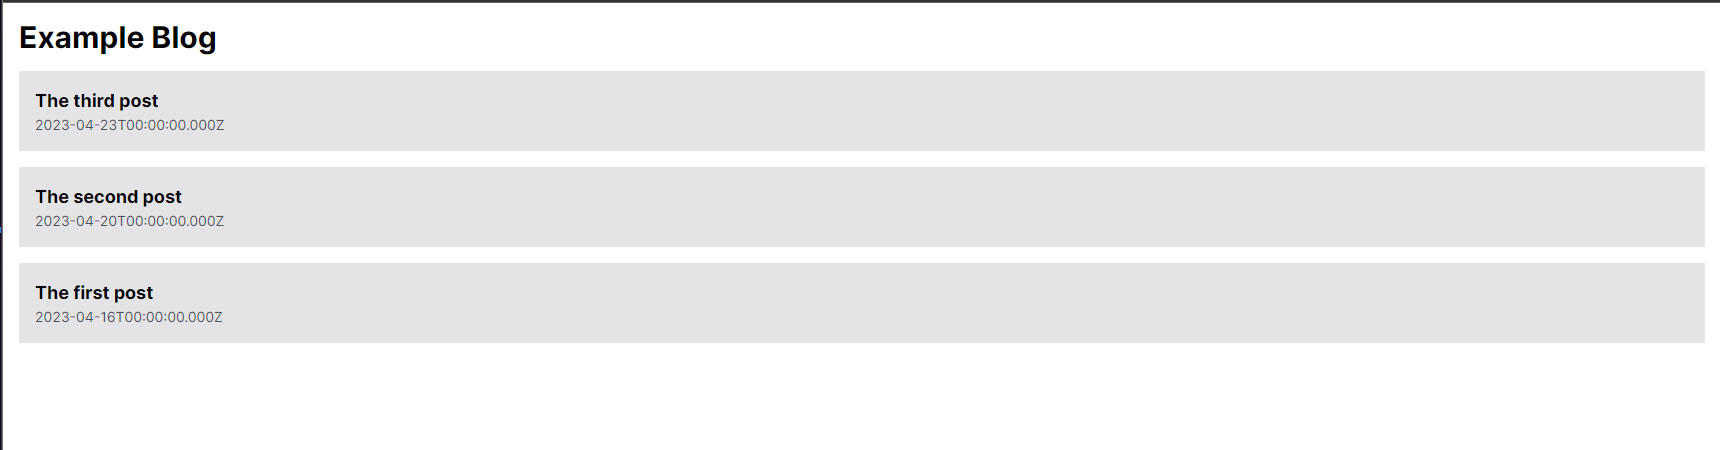
}Now if you navigate to http://localhost:3000/ (or wherever your development server is running) you should see all of the posts you
defined in step 4 in a somewhat nicely formatted list sorted in reverse chronological order. Of course you could
do any amount of styling or additional processing to this data to make this page look and feel your own, but it's a great starting point.
6. Rendering our posts
At the moment if you click one of the above posts you are greeted with a 404 error, that's because we haven't yet created a page that will be responsible for rendering the data provided by Contentlayer to a page. So let's look at doing that right now!
This post only covers adding support for Markdown (.md) files, I will cover adding support for MDX (.mdx) files in a
the next post which will be linked at the end of this page.
We'll start by creating a new page in the app directory under app/posts/[...slug]/page.tsx and pasting in the following code:
import Link from 'next/link';
import { notFound } from 'next/navigation';
import { allPosts } from 'contentlayer/generated';

type Props = {
  params: {
    slug: string[];
  };
};

export async function generateStaticParams(): Promise<Props['params'][]> {
  return allPosts.map(({ url }) => ({
    slug: url.split('/').slice(1), // Remove posts from the start of the url
  }));
}

export default function Page({ params }: Props) {
  const post = allPosts.find((post) => post.url === `/posts/${params.slug.join('/')}`);

  if (!post) {
    notFound();
  }

  return (
    <article className="mx-auto max-w-3xl py-8">
      <Link href="/" className="text-center font-semibold text-indigo-500">
        Home
      </Link>

      <div className="my-6">
        <h1 className="mb-1 text-3xl font-bold">{post.title}</h1>
        <time dateTime={post.publishedDate} className="block text-sm text-zinc-600">
          {post.publishedDate}
        </time>
      </div>

      <div dangerouslySetInnerHTML={{ __html: post.body.html }}></div>
    </article>
  );
}
Now there is a lot to take in there, so let's go through this in byte-size chunks.
First of all we define a new type called Props this is defining a type that we are going to use in the two following functions to
type the parameter passed from generateStaticParams into our Page function.
type Props = {
  params: {
    slug: string[];
  };
};
Secondly, we define and export a function called generateStaticParams, with NextJS App Directory this is a special
function that can be used to generate dynamic route parameters at build time instead of on-demand at request time. In this case in our function
we are getting our allPosts array and mapping it to { slug: url.split('/').slice(1) }, which effectively sets up all the
parameters for our page component for each of our posts. In this function we also remove the /posts/ from the beginning of the url
so the route is correct.
export async function generateStaticParams(): Promise<Props['params'][]> {
  return allPosts.map(({ url }) => ({
    slug: url.split('/').slice(1), // Remove posts from the start of the url
  }));
}
Finally, we export our page function which takes in our generated Props and renders the post. In this basic example we are finding
the specific post from within our generated allPosts array, if it does not exist we call NextJS's notFound which shows a 404
error. But if the post is found we construct some HTML to display a Home link and the Title/PublishedDate of the post, and finally we add
the generated html to a div on the page using dangerouslySetInnerHTML.
export default function Page({ params }: Props) {
  const post = allPosts.find((post) => post.url === `/posts/${params.slug.join('/')}`);

  if (!post) {
    notFound();
  }

  return (
    <article className="mx-auto max-w-3xl py-8">
      <Link href="/" className="text-center font-semibold text-indigo-500">
        Home
      </Link>

      <div className="my-6">
        <h1 className="mb-1 text-3xl font-bold">{post.title}</h1>
        <time dateTime={post.publishedDate} className="block text-sm text-zinc-600">
          {post.publishedDate}
        </time>
      </div>

      <div dangerouslySetInnerHTML={{ __html: post.body.html }}></div>
    </article>
  );
}
And that's all there is to it, clicking on a link to one of the posts on our feed should now take us to the generated html from our markdown files!
We now have a working site that generates html from our markdown files, from here we can do almost anything we want to style the html such as adding CSS styles. So you may be asking...
What to do next?
That's a good question as there are a number of ways to further improve this:
- Supporting MDX (React Components within Markdown) as I mentioned earlier in this post
- Properly styling the generated html with
@tailwindcss/typography - Adding Metadata such as Title/Description/Topic/Tags both to the page and to the
<head> - OpenGraph Image Generation
- Support more Markdown/MDX features such as:
- GitHub Flavoured Markdown, which is a dialect of Markdown which you may prefer if you are used to GitHub's Markdown features
<pre><code>...</code></pre>Code Blocks with proper syntax highlighting- Inline images with the ability to add captions and using
@next/imageto optimize the images - Auto-linking headings
All of this as well as how to deploy our built blog to Vercel will be covered in future posts. As soon as they are available I will be sure to link them below! In the meantime if you have any ideas for how you could improve this or make it your own, I highly encourage you to experiment and make something for yourself. And if you do I'd be delighted if you could send me a screenshot/link on Twitter!
If you want to see a full working example then the code featured in the snippets above is available on GitHub DrBarnabus/next13-blog or feel free to take a look at the code for my personal blog (the site you are currently on 😉) which is also available on GitHub DrBarnabus/danielwoodward-dev.
I am currently planning to release a new part of this blog each week until I have covered all of the topics I want to cover. If you want to be notified when the next part is available then I would recommend following my Twitter and I will tweet as soon as the next part is available.
Thanks for taking the time to read my post, I hope you enjoyed reading it! If you did I would greatly appreciate it if you shared it with your friends and colleagues.
Whether you did or you didn't I would love to hear your feedback; what works, what doesn't, did I leave anything out? Unfortunately I haven't implemented comments yet, but my socials are linked in the footer of this page if you wish to contact me.
If you liked this post, then you might also be interested in:
Enriching your Next.js blog by enabling GitHub Flavoured Markdown, Code Syntax Highlighting and upgrading to Next.js 14!
Enriching your NextJS 13 blog with support for MDX and styling the generated content with TailwindCSS Typography!